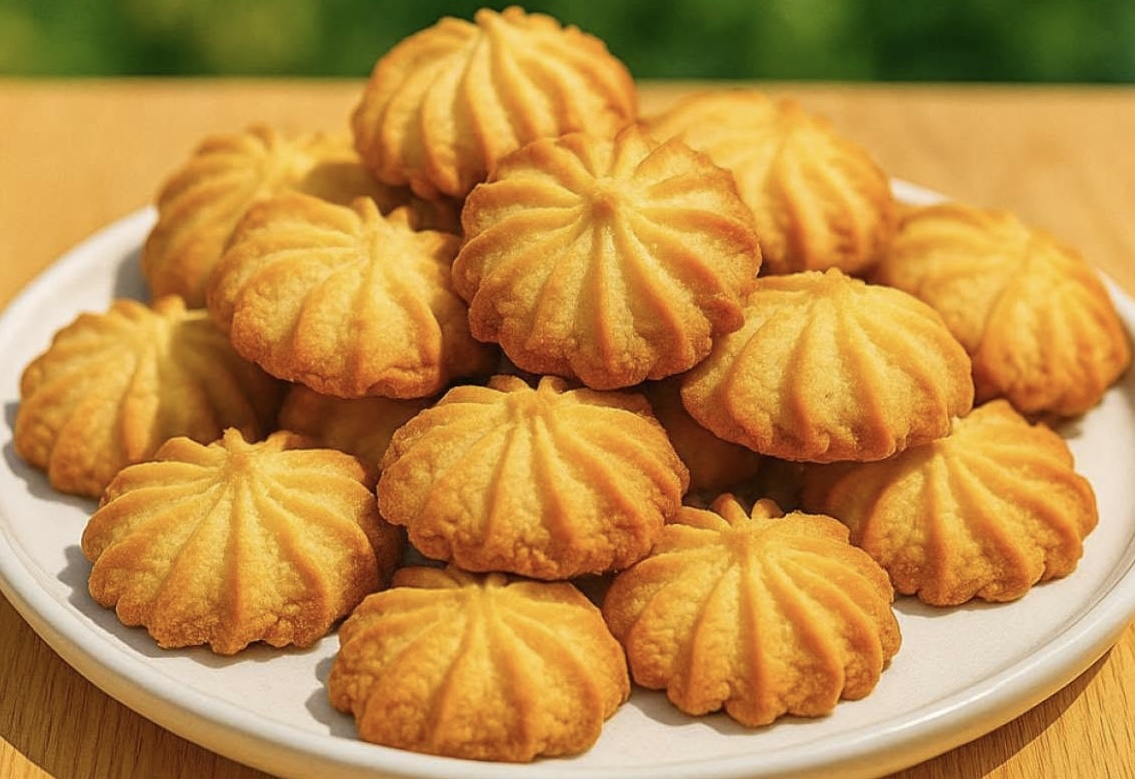
Butter cookies are the kind of treat that never go out of style. Delicate, crisp at the edges, and melt-in-your-mouth tender, these cookies are made with the most basic pantry ingredients—yet they deliver outstanding flavor and texture. This recipe showcases the essence of a classic European-style butter cookie: rich with real butter, lightly sweet, and beautifully piped into rosette shapes that bake into golden perfection.
This particular recipe yields cookies with a delicate crunch and smooth, tender crumb. The technique is simple and straightforward: creamed butter and sugar, one egg yolk for richness, a dash of vanilla for aroma, and all-purpose flour to bind everything together. The result is a batch of elegant cookies that are as suitable for holiday gifting as they are for an afternoon tea tray or late-night snack.
Let’s walk through the method in detail, explore some common pitfalls to avoid, and share ideas for storing and customizing your cookies.
Ingredients
This recipe yields around 30 to 40 small butter cookies, depending on how large you pipe them.
200 g (1 cup) unsalted butter, softened
100 g (1/2 cup) granulated sugar
1 egg yolk
1 tsp vanilla extract (optional)
250 g (2 cups) all-purpose flour
Pinch of salt
Step-by-Step Instructions
1. Cream the Butter and Sugar
Start by placing the softened butter and sugar into a large mixing bowl. Using a hand mixer or stand mixer with the paddle attachment, beat the mixture on medium speed for 2 to 4 minutes. The goal is to create a light and fluffy texture. This step is essential because it incorporates air into the butter, which helps the cookies maintain a delicate crumb.
Make sure the butter is truly at room temperature—not too soft, but pliable enough to beat smoothly. If the butter is too cold, it won’t cream properly. If it’s too melted, the dough will be greasy and the cookies may spread too much during baking.
Scrape down the sides of the bowl as needed to ensure all the sugar is incorporated.
2. Add the Egg Yolk and Vanilla Extract
Once the butter and sugar are creamed to a pale, fluffy consistency, add the egg yolk. This adds richness and helps bind the dough without making it too wet, which is key for piping.
Add the vanilla extract at this stage if using. Though optional, vanilla brings a warm, fragrant note to the cookies that pairs wonderfully with the butter and sugar.
Beat until the yolk and vanilla are fully incorporated. The mixture should look smooth and slightly glossy at this point.
3. Mix in the Flour and Salt
Next, sift the flour and salt together in a separate bowl to remove any lumps and ensure even distribution. Add the dry ingredients to the butter mixture in stages, mixing on low speed or by hand.
Mix only until the dough comes together. It should be soft but not sticky, and hold its shape when piped. Overmixing at this stage can result in tough cookies, so stop as soon as the flour is absorbed.
If the dough feels too stiff to pipe, you can let it rest at room temperature for 5 to 10 minutes to soften slightly. Conversely, if it’s too soft (especially in warm environments), chilling it briefly can help.
4. Shape the Cookies
Fit a piping bag with a large open star tip (such as Wilton 1M or similar). Transfer the dough into the bag. If the dough is firm and well mixed, it should pipe smoothly. You may need to work in batches if the bag becomes difficult to squeeze.
Line a baking tray with parchment paper. Pipe small rosettes or rings, leaving about 2 cm (about 1 inch) of space between cookies. They won’t spread much, but they do puff slightly.
For a cleaner look, you can use a bit of dough in the corners of the parchment to help hold it in place while piping.
Optional step: If desired, you can press a small piece of candied cherry, nut, or chocolate chip into the center of each cookie before baking for a decorative finish.
5. Bake the Cookies
Preheat your oven to 170°C (340°F), conventional setting (not fan-forced, unless you reduce the temperature slightly). Place the tray in the middle rack of the oven and bake for 12 to 15 minutes, or until the edges of the cookies turn a light golden brown.
Watch carefully in the last few minutes of baking, as butter cookies can go from golden to overbaked quickly. The centers should remain pale, while the edges take on a warm color.
Depending on your oven and the size of the cookies, baking time may vary slightly. It’s a good idea to test-bake one tray first before proceeding with the rest of the batch.
6. Cool and Store
Once baked, let the cookies rest on the tray for about 5 minutes before transferring them to a wire rack to cool completely. They will be delicate while hot but firm up as they cool.
After cooling, store the cookies in an airtight container at room temperature. They will keep well for 1 to 2 weeks if stored properly, maintaining their crisp texture and buttery flavor.
Tips for Success
- Butter quality matters: Since butter is the star of this recipe, use high-quality unsalted butter for the best flavor.
- Don’t skip creaming: This step introduces air and gives the cookies their light, crisp texture.
- Use a large star tip: The dough is too firm for small or closed piping tips. A wide open tip gives the best results.
- Room temperature ingredients: Ensure all ingredients, especially the butter and egg yolk, are at room temperature for smooth mixing.
- Do not overbake: The cookies should be just lightly golden at the edges. Overbaking can result in dry, overly crisp cookies.
Variations and Additions
This butter cookie recipe is a perfect base for customization. Here are a few ideas to change things up:
- Chocolate-Dipped: Once cooled, dip one half of each cookie into melted dark or milk chocolate. Place on parchment until set.
- Citrus Twist: Add finely grated lemon or orange zest along with the vanilla extract for a fresh aroma.
- Almond Flavor: Substitute vanilla extract with almond extract for a more intense flavor.
- Jam-Filled: Pipe the dough into rings and spoon a tiny amount of thick jam into the center before baking.
- Holiday Touch: Add festive colored sprinkles before baking for a Christmas or celebration cookie.
Storage and Make-Ahead Tips
These cookies store beautifully, making them ideal for gifting, batch baking, or prepping ahead for parties.
- Room Temperature: Store in an airtight tin or cookie jar for up to 2 weeks.
- Freezing Dough: You can freeze the unbaked piped dough shapes on a tray until firm, then transfer to freezer bags. Bake directly from frozen, adding an extra 1–2 minutes to the baking time.
- Freezing Baked Cookies: Fully baked and cooled cookies can also be frozen in layers between parchment. Thaw at room temperature for 10–15 minutes before serving.
Troubleshooting Guide
- Dough too stiff to pipe: If the dough is crumbly or stiff, it may be overmixed or too cold. Let it rest slightly at room temperature and knead gently with your hands to soften.
- Cookies spread too much: This usually means the butter was too soft or the dough was undermixed. Chill the piped shapes for 15 minutes before baking.
- Cookies are too dry: Overbaking is the most common cause. Remove the cookies from the oven when the edges are just golden.
- Grainy texture: This can happen if the sugar isn’t fully creamed into the butter. Make sure the butter and sugar are well combined before adding other ingredients.
Serving Suggestions
Butter cookies pair well with hot drinks, particularly tea, espresso, or spiced chai. Their rich, not-too-sweet flavor makes them a lovely accompaniment to desserts like chocolate mousse or lemon sorbet.
For gatherings or afternoon tea, arrange the cookies on a tiered serving platter with other bite-sized treats like almond biscotti, mini tarts, or shortbread fingers.
Cultural Notes
These cookies are reminiscent of the Danish butter cookies often sold in round blue tins—familiar in many households during holidays. European-style butter cookies have long been a staple in tea culture and festive baking, with regional variations in texture and shape. The piped rosette version is especially popular for its visual appeal and tender crumb, commonly seen in bakeries across Europe and Asia.
Final Thoughts
Simple ingredients, a classic technique, and a few minutes of hands-on effort—that’s all it takes to create a batch of truly irresistible butter cookies. Whether you’re baking for a holiday gift box or looking for a timeless treat to keep on hand, this recipe delivers consistently beautiful, buttery results.
Feel free to personalize with your favorite flavors or keep them plain for a purist’s experience. Once you’ve mastered this base recipe, you can confidently build on it to create an entire cookie platter full of delightful variations.
These butter cookies are crisp, delicately sweet, and rich in real butter flavor—the kind of treat that brings comfort and elegance to any occasion.