Chocolate fudge balls are a no-bake, irresistibly rich treat that comes together with just a handful of ingredients and minimal effort. They are the perfect bite-sized indulgence: chewy on the outside, creamy in the center, and dusted with a soft cocoa finish. Whether you’re preparing a party tray, looking for a quick homemade gift, or simply satisfying your own sweet tooth, these fudge balls are guaranteed to please.
What makes this recipe special is the clever combination of crushed biscuits and sweetened condensed milk to create a dough that mimics the consistency of fudge—dense, moist, and sweet—without any need for baking or complex steps. Inside each ball hides a pocket of melted chocolate or spread that adds a burst of extra flavor with every bite. They’re easy enough to make with kids, yet elegant enough for holiday platters.
Let’s dive into the full process of making these no-bake chocolate fudge balls, from the choice of ingredients to step-by-step instructions, serving suggestions, and helpful tips for storage and customization.
The Ingredients You’ll Need
To make chocolate fudge balls, you need only a few pantry staples. Here’s a breakdown of each component:
- 1 pack of biscuits (about 180–200 g): Choose plain, firm biscuits like digestive, graham crackers, or Oreos (cream removed). They form the base of the dough.
- 2 tablespoons unsweetened cocoa powder: Adds chocolate depth and balances the sweetness from the condensed milk.
- 1/2 can sweetened condensed milk (about 200 ml): Binds the crushed biscuits and cocoa together into a dough while providing moisture and sweetness.
- Chocolate spread or chocolate cubes (for filling): This could be Nutella, ganache, or a simple milk chocolate square—something that melts slightly in the center for a gooey surprise.
- Extra cocoa powder (for coating): A light dusting gives the exterior a classic truffle look and a slightly bitter contrast to the sweet filling.
Optional additions could include shredded coconut, chopped nuts, or even a dash of espresso powder if you want to intensify the chocolate flavor.
Step-by-Step Instructions
1. Crush the biscuits
Place the biscuits in a food processor and pulse until they become a fine, sandy texture. If you don’t have a processor, put the biscuits in a zip-lock bag and crush them using a rolling pin. Make sure there are no large chunks left; the smoother the powder, the smoother the final dough.
2. Mix in the cocoa powder
Add the cocoa powder to the biscuit crumbs and stir until fully incorporated. The cocoa should be evenly distributed, giving the dry mix a deep brown color.
3. Add sweetened condensed milk
Gradually pour in the sweetened condensed milk while mixing. You want to form a soft, pliable dough that holds together easily when pressed. Depending on the biscuit type and their dryness, you might need a little more or slightly less condensed milk. The goal is a dough that’s moist but not sticky.
4. Shape and fill the balls
Take a small amount of the dough (about the size of a walnut), flatten it gently in your palm, and place a teaspoon of chocolate spread or a small chocolate cube in the center. Carefully seal the edges and roll into a ball. Make sure the filling is completely covered to avoid leakage during chilling.
5. Coat in cocoa powder
Roll the shaped balls in unsweetened cocoa powder. This not only enhances the appearance but adds a slight bitterness that complements the sweet, fudgy center.
6. Chill before serving
Place the coated fudge balls on a tray lined with parchment paper and chill in the fridge for at least 1 hour. This helps them firm up and allows the flavors to meld.
Serving Suggestions
These chocolate fudge balls can be served in many creative ways depending on the occasion:
- Party platter: Arrange them on a tray with fresh berries, dried fruits, and nuts.
- Gift box: Place each ball in a mini paper cupcake liner and box them up as a thoughtful homemade present.
- Dessert table: Serve alongside coffee, hot chocolate, or even chilled milk for a complete dessert moment.
- Holiday twist: Coat in crushed peppermint, sprinkles, or coconut for festive variations.
They also pair beautifully with a scoop of vanilla ice cream or drizzled with melted dark chocolate for an extra-rich dessert.
Tips for Best Results
- Consistency check: If your dough is too sticky to roll, add a little more biscuit crumbs or a teaspoon of cocoa powder. If it’s too dry and crumbly, drizzle in a bit more condensed milk.
- Use gloves or lightly oiled hands when shaping the balls to avoid the dough sticking to your fingers.
- Chill the dough before shaping if it feels too soft to handle after mixing. A quick 15-minute chill can make it easier to roll.
- Choose a creamy filling: Nutella, peanut butter, or chocolate truffle paste all work well and stay gooey in the center after chilling.
Variations to Try
This basic recipe is easy to customize to suit your taste or occasion. Here are some delicious ideas:
- Nutty version: Mix chopped hazelnuts or almonds into the dough for crunch.
- Coconut fudge balls: Roll in shredded coconut instead of cocoa for a lighter finish.
- Mocha balls: Add 1/2 teaspoon of instant coffee or espresso powder to the dough.
- Chili chocolate: Add a pinch of chili powder or cayenne for a spicy surprise.
- Fruit infusion: Stir in finely chopped dried fruits like cranberries, cherries, or raisins for chewy contrast.
- Salted caramel filling: Add a small dollop of caramel to the center and finish with a pinch of sea salt.
Storage and Shelf Life
Chocolate fudge balls can be stored in an airtight container in the fridge for up to 7 days. The texture becomes fudgier and denser the longer they sit, making them ideal for making ahead of time.
If you want to freeze them, place the finished and coated fudge balls on a tray, freeze until solid, then transfer to a freezer-safe bag or container. Thaw in the fridge before serving. They can be frozen for up to 2 months.
Why You’ll Love These Fudge Balls
There’s a reason why this recipe is loved across the globe—it’s:
- No-bake and no-fuss: You don’t need an oven, mixer, or any fancy tools.
- Quick to prepare: From start to finish, the process takes under 30 minutes (plus chilling).
- Customizable: Easily adapted with whatever you have in your kitchen.
- Kid-friendly: Safe and fun to make with children, especially the rolling and filling steps.
- Perfect for all occasions: From casual snacking to formal events, these fudge balls always feel special.
Texture and Flavor
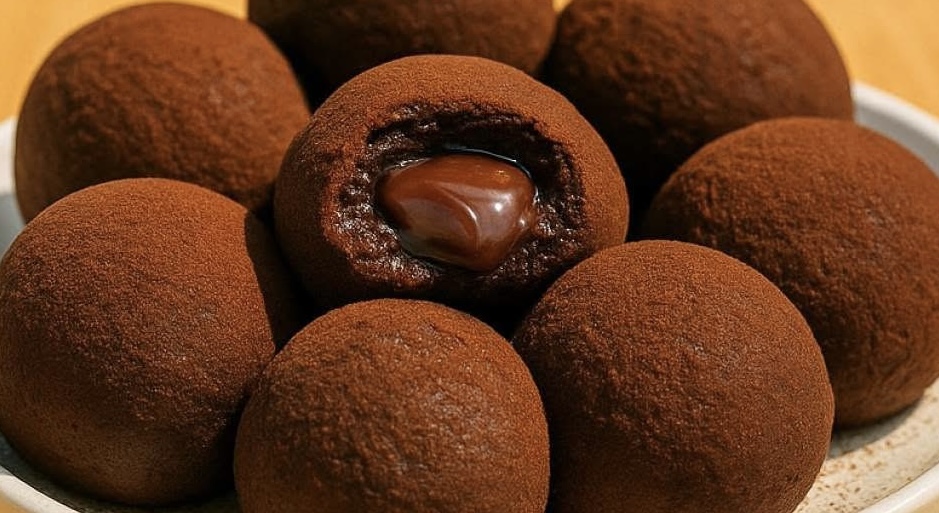
The outside of each fudge ball is firm with a subtle bitterness from the cocoa coating. The biscuit-based dough provides a satisfying chew with a smooth, fudge-like finish. Inside, the chocolate center is gooey and rich, offering a perfect contrast to the drier shell. Each bite is layered with taste and texture, making them more than just another sweet bite.
Ingredient Substitutions
If you’re missing some ingredients, here are simple swaps you can try:
- Biscuit base: Use graham crackers, plain tea biscuits, Marie biscuits, or chocolate chip cookies (without chocolate).
- Condensed milk: Can’t be substituted directly, but you can make a vegan version using coconut condensed milk or sweetened plant-based alternatives.
- Cocoa powder: If using Dutch-processed cocoa, reduce the quantity slightly for a less intense result.
- Chocolate filling: If chocolate spread isn’t available, use a soft chocolate truffle, fudge cube, or even a peanut butter center.
Making It Vegan
To make vegan chocolate fudge balls:
- Use plant-based biscuits (check for dairy-free labeling).
- Replace sweetened condensed milk with a vegan alternative (like oat or coconut condensed milk).
- Use dairy-free chocolate spread or vegan chocolate chunks for the filling.
- Choose non-dairy cocoa powder and ensure no milk solids are present.
Final Thoughts
Chocolate fudge balls are the perfect go-to treat when you want something indulgent without spending hours in the kitchen. They require no baking, can be easily customized, and are ideal for sharing, gifting, or quietly enjoying with a cup of tea.
Their soft texture, rich chocolatey flavor, and creamy surprise in the center make them a crowd-pleaser across all ages. Whether served chilled on a summer day or as a sweet bite during winter holidays, they never go out of style.
Once you make these, don’t be surprised if they become a regular feature in your kitchen. Keep a batch in the fridge, and you’ll always have something sweet and satisfying ready to enjoy.
Ingredients Recap
- 1 pack of biscuits (like digestive or Oreo without the cream)
- 2 tablespoons unsweetened cocoa powder
- 1/2 can sweetened condensed milk (about 200 ml)
- Chocolate spread or small chocolate cubes (for filling)
- Extra cocoa powder (for coating)
Instructions Summary
- Crush biscuits into fine crumbs.
- Mix in cocoa powder.
- Add condensed milk and stir into dough.
- Flatten a piece, fill with chocolate, and roll into balls.
- Coat in cocoa powder.
- Chill for 1 hour before serving.
Rich, gooey, satisfying—and no oven required.