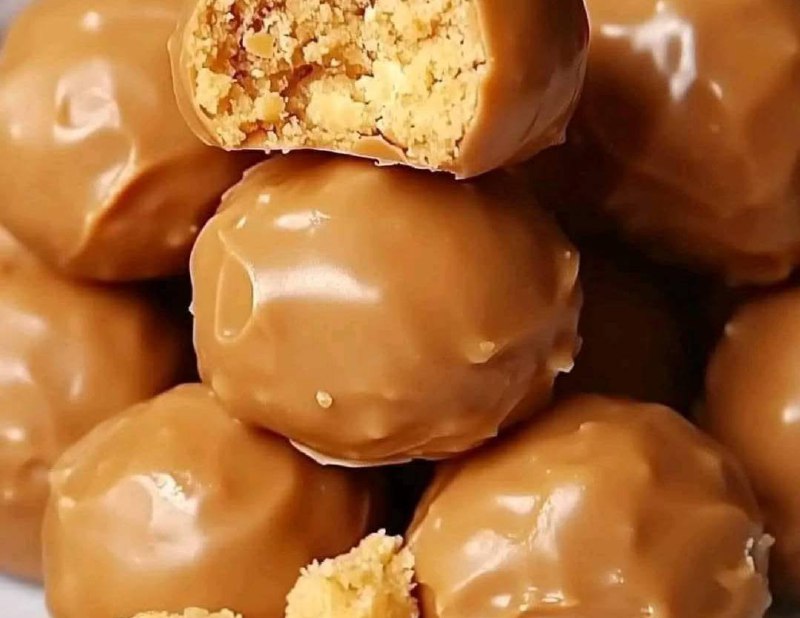
Butterfinger Balls are a delightful treat that combines the creamy richness of peanut butter, the sweetness of powdered sugar, and the nostalgic crunch of Butterfinger candy. These bite-sized desserts are a hit at parties, family gatherings, or anytime you crave a quick, no-bake indulgence. They’re incredibly easy to make and require only a handful of ingredients.
This recipe is perfect for beginners and seasoned bakers alike. With a soft peanut butter center and a crispy chocolate coating, Butterfinger Balls offer a contrast of textures and flavors that are hard to resist. Below, you’ll find a complete step-by-step guide to preparing these delicious homemade confections from scratch.
Ingredients for Butterfinger Balls
- 1 cup creamy peanut butter
- 1/2 cup butter, softened
- 1 teaspoon vanilla extract
- 1 cup powdered sugar
- 2 ½ cups crushed Butterfinger candy bars
- 2 cups semi-sweet or milk chocolate chips
- 1 tablespoon coconut oil or shortening (optional, for smoother chocolate)
Optional Garnish:
- Additional crushed Butterfinger for topping
- Sprinkles or sea salt
Step-by-Step Instructions
- Crush the Butterfinger Candy Bars
Start by placing the Butterfinger bars in a zip-top bag. Use a rolling pin or the bottom of a pan to crush them into fine crumbs. You can also use a food processor for a more uniform texture. Set the crushed candy aside for mixing later. - Cream Together the Peanut Butter and Butter
In a large mixing bowl, combine the softened butter and peanut butter. Use a hand mixer or a stand mixer to beat the ingredients until they’re light and fluffy. This step helps create a smooth, creamy base for your Butterfinger Balls. - Add Vanilla Extract and Powdered Sugar
Pour in the vanilla extract and gradually add the powdered sugar, beating on low speed until everything is fully incorporated. The mixture should be thick and slightly sticky but easy to mold with your hands. - Mix in Crushed Butterfinger
Fold in about 1 ½ to 2 cups of the crushed Butterfinger candy bars into the peanut butter mixture. Mix thoroughly using a spatula or your hands. The goal is to evenly distribute the candy pieces throughout the dough for that signature crunch in every bite.
- Form the Balls
Using a small cookie scoop or a tablespoon, scoop out portions of the mixture and roll them into smooth balls between your palms. Place them on a baking sheet lined with parchment or wax paper. Once all the balls are formed, place the tray in the refrigerator for at least 30 minutes to allow them to firm up. - Melt the Chocolate
While the balls are chilling, prepare the chocolate coating. In a microwave-safe bowl or using a double boiler, melt the chocolate chips. If desired, add a tablespoon of coconut oil or shortening to make the chocolate smoother and glossier. - Dip the Balls in Chocolate
Remove the chilled peanut butter balls from the fridge. Using a fork or toothpick, dip each ball into the melted chocolate until fully coated. Allow excess chocolate to drip off before placing them back onto the parchment-lined sheet. - Add Toppings (Optional)
While the chocolate is still wet, sprinkle a bit of the remaining crushed Butterfinger over the top for a decorative and flavorful finish. You can also experiment with sprinkles, chopped nuts, or a drizzle of white chocolate.
- Let Them Set
Allow the coated Butterfinger Balls to set completely. You can leave them at room temperature for about 1 hour or refrigerate for 15–20 minutes until the chocolate hardens. - Serve and Store
Transfer the Butterfinger Balls to an airtight container. Store them in the refrigerator for up to 2 weeks or freeze for longer storage. Serve chilled or at room temperature, depending on your texture preference.
Tips for the Best Butterfinger Balls
- Use good quality peanut butter. Avoid overly oily or natural peanut butters that can cause separation.
- For a smoother dipping process, chill the rolled balls thoroughly before coating them in chocolate.
- Crushed Butterfinger can be made in bulk and stored in an airtight container for future recipes.
- If you’re having trouble dipping the balls, insert a toothpick or skewer into each one before dipping.
- Don’t overheat the chocolate — warm it in short intervals in the microwave, stirring in between to prevent burning.
Butterfinger Balls Variations
Although the classic Butterfinger Balls are nearly perfect as-is, you can experiment with some variations to make them uniquely yours:
- Oreo Butterfinger Balls
Mix in some finely crushed Oreo cookies with the Butterfinger pieces for a cookies-and-candy combo. - White Chocolate Coating
Substitute white chocolate for the dark or milk chocolate for a sweeter and more colorful alternative. - Nut-Free Version
Try using sunflower seed butter instead of peanut butter for a nut-free alternative. - Almond Butter Version
Replace peanut butter with almond butter for a milder flavor and slightly different texture. - Protein-Packed Balls
Add a scoop of vanilla or chocolate protein powder to the peanut butter mixture for a post-workout treat.
Why You’ll Love These Butterfinger Balls
- No-Bake Recipe: Quick and oven-free. Perfect for hot days or when you want a fast dessert.
- Crowd-Pleaser: A hit at any event, from potlucks to holiday cookie trays.
- Versatile: Easily customizable with different coatings or mix-ins.
- Make-Ahead Friendly: Stores well in the fridge or freezer for future snacking.
Make Them a Gift
Butterfinger Balls also make wonderful homemade gifts. Wrap them in decorative boxes or jars, tie with a ribbon, and include a handwritten label. They are great for birthdays, holidays, or thank-you gifts. You can even get creative by packaging them with a little note card that includes the ingredients or your favorite memory associated with the treat.
Kid-Friendly Activity
This recipe is also a great project to do with kids. From mixing and rolling to dipping and decorating, there’s a step for everyone to enjoy. Just make sure an adult handles the chocolate melting part, and kids will love being able to decorate their own Butterfinger Balls.
Serving Ideas
- With Ice Cream: Serve two or three chilled Butterfinger Balls over a scoop of vanilla or chocolate ice cream.
- Party Tray: Include them on a platter with cookies, brownies, and other bite-sized sweets.
- Holiday Dessert Table: Add them to your Christmas or Thanksgiving dessert lineup.
- Late-Night Treat: Store a few in the freezer for a ready-to-eat late snack.
Butterfinger Ball FAQs
Can I use crunchy peanut butter instead of creamy?
Yes, crunchy peanut butter adds extra texture, though it may be more difficult to roll into smooth balls.
Can I freeze Butterfinger Balls?
Yes. Store them in an airtight container in the freezer for up to 3 months. Let them thaw in the fridge or eat straight from frozen.
Why are my balls too soft or sticky?
You may need to chill the dough longer or add a bit more powdered sugar to firm up the mixture before rolling.
Can I use candy melts instead of chocolate chips?
Absolutely. Candy melts work well for dipping and come in various colors and flavors for a festive touch.
Conclusion
Butterfinger Balls are more than just a dessert — they’re a nostalgic bite of crunchy, creamy, chocolatey perfection. Whether you’re making them for a holiday party, a bake sale, or just because you’re craving something sweet, these no-bake delights deliver big flavor with minimal effort. With just a few pantry staples, you can whip up a batch that will impress your friends and family — or just keep them all to yourself (we won’t tell).
Give this recipe a try and experience how a simple combination of ingredients can turn into a truly special treat.