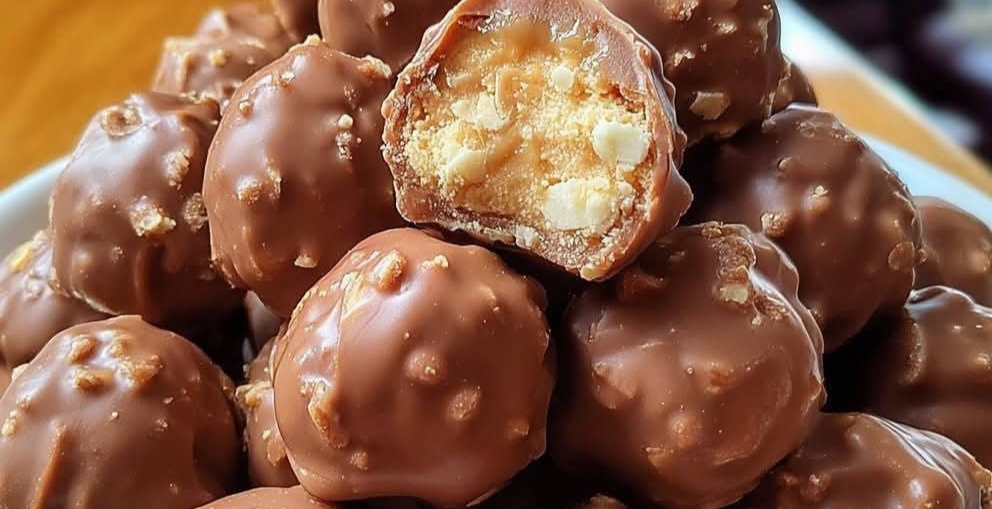
Butterfinger Balls – Easy No-Bake Treat You’ll Love
If you’re looking for a fun, indulgent, and no-bake dessert, these Butterfinger Balls are the perfect treat. With creamy peanut butter, sweet vanilla, and a chocolate coating, they taste just like a homemade version of your favorite candy bar. They’re quick to whip up, don’t require turning on the oven, and make a wonderful addition to holiday trays, party platters, or just a sweet snack for yourself. Don’t lose this recipe—you’ll want to make it again and again!
Ingredients
- 1 cup peanut butter (creamy or crunchy)
- 1/2 cup butter, softened
- 1 teaspoon vanilla extract
- 3 1/2 cups powdered sugar
- 2 1/2 cups crushed Butterfinger candy bars (or about 10–12 mini bars)
- 2 cups semisweet or milk chocolate chips
- 2 tablespoons shortening or coconut oil (for smoother melting)
Step-by-Step Instructions
- Prepare the filling: In a large mixing bowl, combine peanut butter, softened butter, and vanilla extract. Beat until smooth and creamy.
- Add powdered sugar: Gradually mix in the powdered sugar until the mixture becomes thick and dough-like.
- Fold in Butterfinger pieces: Gently stir in the crushed Butterfinger candy bars until evenly distributed throughout the dough.
- Shape the balls: Roll the mixture into 1-inch balls and place them on a baking sheet lined with parchment paper. Chill in the refrigerator for 30 minutes, or until firm.
- Melt the chocolate: In a microwave-safe bowl, melt the chocolate chips with shortening or coconut oil in 30-second intervals, stirring between each, until smooth.
- Dip and coat: Using a fork or dipping tool, roll each chilled ball in the melted chocolate until fully coated. Return to the parchment-lined sheet.
- Set and enjoy: Chill the coated balls in the refrigerator until the chocolate hardens, about 20 minutes. Serve and enjoy!
Baking Tips for Success
- Use room temperature butter: This helps the mixture combine smoothly.
- Don’t over-crush the Butterfingers: Leave a few larger chunks for extra crunch in each bite.
- Chill before dipping: Cold centers make it easier to dip the balls into warm melted chocolate without falling apart.
- Use parchment paper: It prevents sticking and makes cleanup easy.
Fun Variations
- White Chocolate Butterfinger Balls: Swap semisweet chocolate for melted white chocolate for a sweeter twist.
- Dark Chocolate Lovers: Use rich dark chocolate for a more decadent and less sweet coating.
- Nutty Crunch: Add finely chopped peanuts or pretzels to the filling for an extra crunch.
- Festive Touch: Roll freshly dipped balls in sprinkles, crushed cookies, or colored sugar for holidays and parties.
Serving Ideas
These Butterfinger Balls are perfect for:
- Holiday cookie trays or dessert platters.
- Gift boxes for friends, neighbors, or teachers.
- A fun after-dinner treat with coffee or hot cocoa.
- A sweet bite-sized indulgence for movie nights or parties.
Storage & Make-Ahead Tips
Store the finished Butterfinger Balls in an airtight container in the refrigerator for up to 2 weeks. If you’d like to prepare them in advance, you can freeze the undipped peanut butter mixture balls for up to 2 months. Simply thaw in the fridge, dip in chocolate, and serve fresh. They also freeze well once dipped—just thaw overnight in the fridge before enjoying.
Conclusion
Butterfinger Balls are the kind of treat that never last long—they disappear as quickly as you set them out! They’re sweet, creamy, crunchy, and perfectly coated in chocolate, making them an irresistible no-bake dessert. With just a handful of simple ingredients and minimal effort, you can recreate the flavors of a beloved candy bar in bite-sized form. Don’t lose this recipe—it’s one you’ll want to keep in your collection for holidays, parties, and everyday cravings.