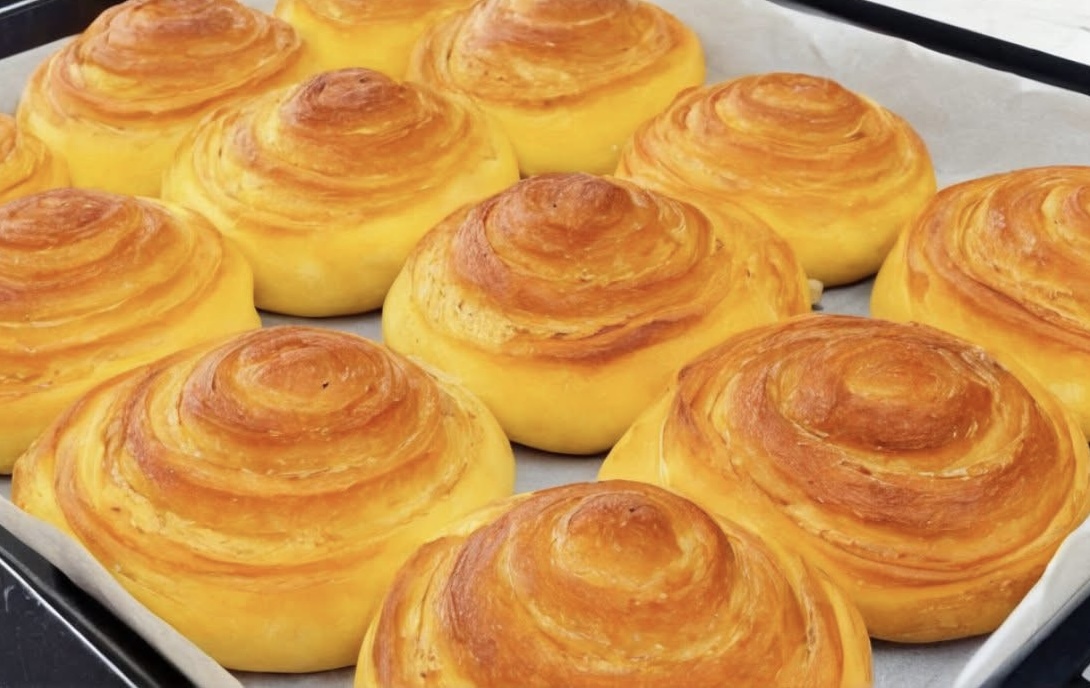
Soft butter rolls are the kind of comforting, homemade bread that feel just as welcome at a holiday feast as they do beside a cup of tea. These swirled, buttery rolls are irresistibly tender with a light golden crust and a rich, melt-in-your-mouth interior. Each roll is layered with softened butter and shaped into delicate spirals, creating soft folds that pull apart with ease.
This recipe uses basic pantry staples—flour, milk, butter, yeast, egg, and sugar—but the final result feels like a treat from a bakery. The process involves an initial rise, a generous butter layering, shaping into spirals, and a second rise before baking. With a little time and care, you’ll end up with beautifully layered, golden rolls that are soft and fragrant straight from the oven.
They’re perfect for breakfast, served with jam or honey, or for dinner alongside soups, stews, or roasted vegetables. You can even enjoy them plain, fresh from the oven, with nothing more than a swipe of extra butter.
Ingredients
4 cups all-purpose flour (500 g)
1 cup warm milk
2 tablespoons sugar
1 teaspoon salt
1 tablespoon instant yeast
1 egg
50 g soft butter (for the dough)
100 g soft butter (for spreading during shaping)
This list of ingredients forms the foundation of these soft, enriched rolls. The dough is tender thanks to the butter and milk, while the sugar and egg help with browning and flavor. The spiral shaping adds a visual charm and makes each bite slightly different in texture—fluffy in the center and delicately crispy on the edges.
Step-by-Step Instructions
Step 1: Activate the Yeast
In a mixing bowl, combine the warm milk, sugar, and instant yeast. Stir gently and let the mixture sit for about 10 minutes. This step activates the yeast and allows it to bloom, forming a foamy surface on the milk.
If the mixture doesn’t foam, it’s likely that the milk was too hot or the yeast is no longer active. The milk should be warm to the touch, around 38°C to 40°C (100°F to 105°F).
This brief waiting period gives the dough a strong start and ensures a good rise later on.
Step 2: Make the Dough
Once the yeast is active and foamy, add the all-purpose flour, salt, egg, and 50 grams of soft butter to the bowl.
Mix everything together using a spoon or your hands until the dough begins to come together. Once it forms a shaggy mass, knead it on a floured surface or in a stand mixer with a dough hook for 8 to 10 minutes. The dough should become smooth, elastic, and slightly tacky but not sticky.
If kneading by hand, use the heel of your hand to stretch the dough forward, fold it over, and repeat. You can lightly flour the surface as needed, but avoid adding too much extra flour or the rolls may become dense.
Once kneaded, shape the dough into a smooth ball.
Step 3: First Rise
Place the dough in a lightly greased bowl, cover it with plastic wrap or a damp cloth, and set it in a warm place to rise. Let it rest for about 1 hour or until doubled in size.
The rise time may vary depending on the temperature of your kitchen. Warmer spaces may need less time; cooler rooms may take a little longer.
Once the dough has doubled, gently press it down to release excess air.
Shaping the Rolls
Step 4: Roll Out the Dough
Transfer the risen dough onto a lightly floured surface. Use a rolling pin to flatten it into a large rectangle, roughly ½ inch thick. Try to maintain even thickness throughout to ensure the rolls bake uniformly.
Once the dough is rolled out, take the 100 grams of softened butter and spread it evenly across the surface. Use a spatula or your fingers to make sure the butter reaches all the way to the edges.
This butter layer will create soft, flaky folds inside the rolls as they bake and rise again.
Step 5: Roll and Slice
Starting from the long edge of the rectangle, begin rolling the dough tightly into a log. Roll slowly and evenly, applying gentle pressure to keep the spiral compact without squishing the dough.
Once you’ve formed a long log, use a sharp knife or unflavored dental floss to slice it into equal pieces. You should end up with 12 to 16 spirals, depending on your preferred size.
Try to keep the cuts clean to maintain the round spiral shape.
Step 6: Second Rise
Line a baking tray with parchment paper and arrange the sliced rolls on it, leaving a bit of space between each one. Cover the tray loosely with a clean kitchen towel or plastic wrap.
Let the rolls rise again for about 30 minutes. During this time, they’ll puff up slightly and become lighter.
This second rise helps create the final airy texture and prevents the rolls from becoming too dense in the oven.
Baking the Rolls
Step 7: Preheat the Oven
While the rolls are resting, preheat your oven to 180°C (350°F). A properly preheated oven ensures the rolls bake evenly and rise nicely during baking.
Step 8: Bake
Once the rolls have puffed up and the oven is hot, place the tray in the center of the oven and bake for 20 to 25 minutes. The tops should become golden brown, and the spirals should be clearly defined and slightly crisp on the edges.
Rotate the tray halfway through baking if your oven tends to have hot spots. This ensures even color and doneness.
Keep an eye on them in the last few minutes. The smell of baked butter and yeast is a good indicator they’re nearly ready.
Optional: Brush with Melted Butter
For a final touch, brush the hot rolls with melted butter immediately after removing them from the oven. This not only adds shine but also softens the outer crust and gives the rolls that irresistible bakery-style aroma.
Let the rolls cool for 10 minutes before serving, though they’re best enjoyed warm.
Texture and Flavor
These soft butter rolls have a rich, buttery flavor with a light, feathery texture. The exterior is lightly golden and tender, while the inside remains soft and layered. Each bite pulls apart effortlessly, revealing delicate, buttery spirals.
Because of the way they’re shaped, the outer edges bake slightly more than the interior, creating a gentle contrast in texture—from soft in the center to lightly crisp at the edge of each swirl.
The overall flavor is subtle and comforting, with a rich dairy note from the milk and butter. A touch of sweetness from the sugar balances the salt and enhances the flavor of the dough without tipping it into dessert territory.
Serving Suggestions
These rolls are incredibly versatile. They pair well with sweet spreads, savory meals, or as a base for sandwiches.
With Breakfast:
Serve warm with jam, honey, or fruit compote. A smear of cream cheese or clotted cream works beautifully, too.
With Soup or Stew:
The soft, buttery texture complements warm soups and hearty stews. Use the rolls to soak up broths and sauces.
As Sandwich Rolls:
Slice open and fill with sliced cheese, eggs, or ham for simple sandwiches.
With Salads:
Serve them alongside green salads or roasted vegetables for a light yet satisfying meal.
As a Holiday Side:
Perfect for Thanksgiving, Christmas, or Eid feasts. Their elegant spiral shape makes them look as good as they taste.
Storage and Reheating
These rolls are best served fresh but can be stored and reheated easily.
Room Temperature:
Store in an airtight container for up to 2 days. If your kitchen is warm, consider refrigerating.
Refrigerator:
Place in a sealed container and store for up to 5 days. Bring to room temperature or warm before serving.
Freezer:
Wrap baked rolls individually in plastic wrap, then place in a freezer bag. Freeze for up to 2 months. Thaw at room temperature, then warm in the oven at 150°C (300°F) for 5 to 8 minutes.
Reheating:
To revive softness, wrap in foil and warm in a low oven. A few seconds in the microwave also works for a quick softening.
Tips for Best Results
Use Soft Butter:
Both the butter added to the dough and the butter used for spreading must be soft—not melted. This makes it easier to incorporate and layer without making the dough too greasy.
Knead Well:
Proper kneading ensures a smooth dough and soft final texture. Look for a dough that feels elastic and stretches without tearing.
Let the Dough Rise Fully:
Don’t rush the rising time. The dough should double in size during the first rise and puff up noticeably during the second. Patience leads to softness.
Roll Tightly and Evenly:
When shaping, roll the dough into a tight log so that the spiral shape holds well. Uneven rolling can cause misshaped or loose rolls.
Avoid Overbaking:
Pull the rolls from the oven once golden. Overbaking can dry them out.
Variations
Garlic Herb Rolls:
Mix minced garlic and chopped parsley into the butter used for spreading. Sprinkle grated cheese before rolling up for an herby, savory version.
Sweet Cinnamon Rolls:
Add sugar and cinnamon to the butter layer before rolling. Once baked, drizzle with a glaze or cream cheese frosting.
Cheese-Filled Spirals:
Add shredded cheese over the butter before rolling for a cheesy twist.
Seed Topping:
Brush the tops with egg wash before baking and sprinkle with sesame or poppy seeds.
Honey Glaze:
For a sweet finish, brush warm rolls with a mix of melted butter and honey.
Final Thoughts
Soft butter rolls are a celebration of simplicity and flavor. They require only a few ingredients, yet the results are so much more than the sum of their parts. With their golden tops, pillowy spirals, and rich buttery aroma, they bring warmth to any table.
The method is approachable and forgiving—perfect for both experienced bakers and those new to yeast doughs. Whether served as part of a family meal, alongside a weekend breakfast, or gifted warm to a neighbor, these rolls have a universal appeal.
Once you’ve made them once, they’ll quickly become a regular favorite in your kitchen. Fluffy, flavorful, and endlessly adaptable, these soft butter rolls are a must-bake recipe you’ll return to again and again.