Crispy chicken tenders are a comfort food classic that never goes out of style. Whether served as a snack, a party appetizer, or part of a main dish with sides, these golden-brown strips are loved by both kids and adults alike. Made with tender strips of chicken breast, coated in a light egg wash, dredged in flour and breadcrumbs, then fried until crisp, they deliver on flavor, crunch, and satisfaction.
In this article, we’ll walk through the full step-by-step process of making the perfect chicken tenders from scratch. You’ll also find tips for preparation, frying techniques, baking alternatives, and ideas for sauces and side dishes.
Ingredients
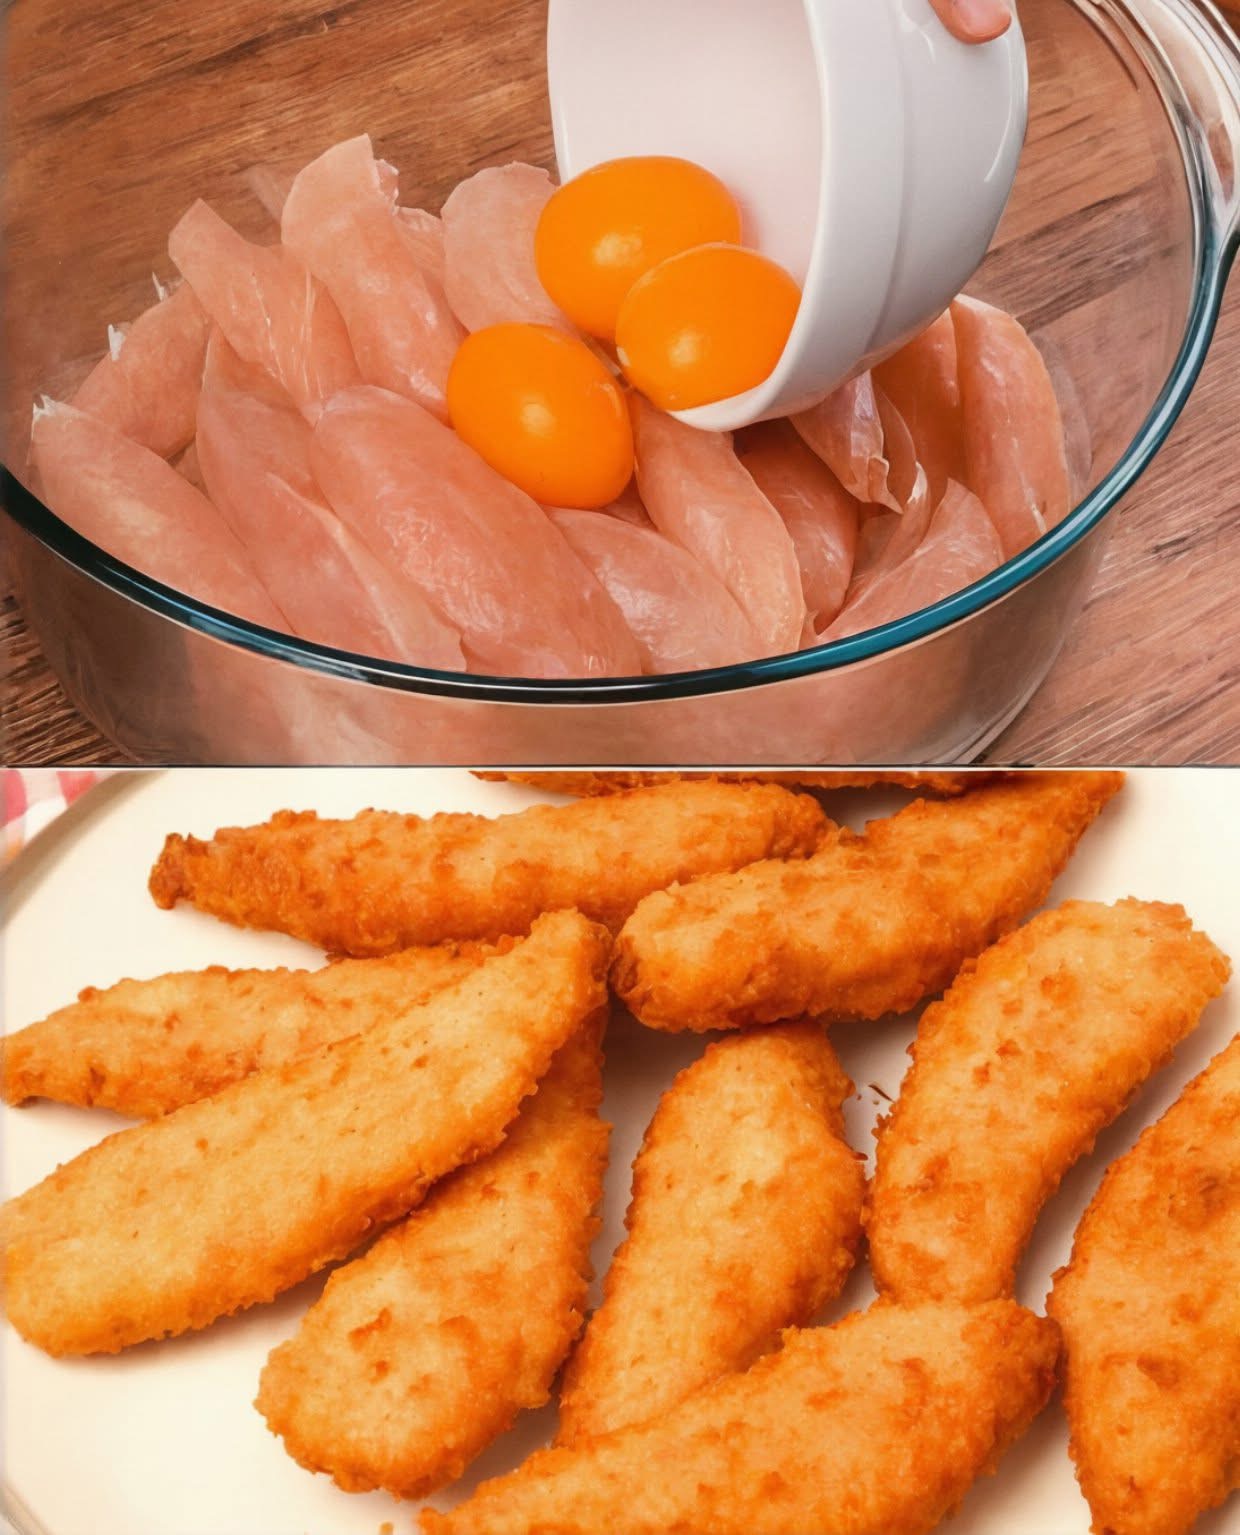
500 grams of chicken breast tenders (about 1.1 pounds), sliced into strips if not pre-cut
2 to 3 egg yolks or whole eggs, depending on size
1 cup of all-purpose flour
1 cup of breadcrumbs or panko for a crunchier texture
1 teaspoon of salt
1/2 teaspoon of ground black pepper
1/2 teaspoon of garlic powder (optional)
1/2 teaspoon of paprika (optional)
Vegetable oil for frying
Optional: you may also use additional spices like onion powder, cayenne pepper, dried herbs, or grated cheese mixed into the breadcrumbs for added flavor variety.
Preparing the Chicken
Start by preparing the chicken tenders. If you’re using whole chicken breasts, slice them lengthwise into even strips, each about the size of your finger. Rinse the strips under cold water and pat them dry thoroughly using paper towels. Removing excess moisture helps the egg and flour coating adhere better to the meat.
Crack two or three eggs or egg yolks into a bowl and whisk them lightly. Place the chicken strips in a large mixing bowl and pour the eggs over them. Mix until each piece is coated evenly in the egg. Set aside to let them marinate for 5 to 10 minutes while you prepare the dry coating ingredients.
Setting Up a Breading Station
To properly coat the chicken, you will need two shallow bowls or plates.
In the first bowl, combine the all-purpose flour with salt, pepper, garlic powder, and paprika. This seasoned flour gives the chicken its first layer of flavor and texture.
In the second bowl, pour your breadcrumbs or panko. If you’re using regular breadcrumbs, the result will be more classic and fine. Panko gives a crispier, flakier crust.
You can also add a bit of grated Parmesan or dried parsley to the breadcrumb mix for variation.
Coating the Chicken
Working with one chicken tender at a time, follow this sequence:
- Remove the egg-coated tender from the bowl. Let the excess egg drip off.
- Dredge the tender in the seasoned flour mixture. Press lightly to ensure the flour adheres to all sides.
- Dip the floured chicken back into the egg wash.
- Coat it thoroughly with the breadcrumbs or panko.
Repeat this process for all the tenders. For a crunchier coating, you can even double-dip: repeat the flour and breadcrumb steps for a thicker crust.
Once all the tenders are coated, place them on a tray or plate. Let them sit for 5 to 10 minutes before frying. This allows the coating to set, which reduces the risk of the breadcrumbs falling off during cooking.
Frying the Chicken Tenders
Heat a deep pan or skillet with vegetable oil. You’ll need enough oil to submerge at least half of the chicken strip’s height. A cast-iron skillet, heavy-bottomed pan, or deep fryer works best.
Heat the oil to 170°C to 180°C (340°F to 355°F). If you don’t have a thermometer, you can test the temperature by dropping a small piece of bread or batter into the oil. If it sizzles and turns golden within 10–12 seconds, the oil is ready.
Carefully place the coated chicken tenders into the hot oil in batches. Avoid overcrowding the pan as it can lower the oil temperature and result in soggy tenders.
Fry each piece for approximately 3 to 4 minutes per side, or until golden brown and crispy. The exact time may vary depending on the size and thickness of the chicken pieces.
Use tongs to flip the tenders for even browning. Once cooked, transfer them to a plate lined with paper towels to absorb excess oil.
Let the chicken rest for a few minutes before serving. The outer crust will stay crisp while the inside remains juicy and tender.
Baking or Air Fryer Option
If you prefer a healthier cooking method, you can bake or air-fry the chicken tenders.
For baking:
Preheat your oven to 200°C (390°F).
Place the coated tenders on a baking sheet lined with parchment paper or lightly greased foil.
Spray or brush the top of each tender with a small amount of oil.
Bake for 20 to 25 minutes, flipping halfway through, until golden and cooked through.
For air frying:
Preheat the air fryer to 200°C (390°F).
Arrange the chicken tenders in a single layer in the basket.
Spray with a bit of cooking oil.
Cook for 15 to 18 minutes, flipping at the halfway mark.
Both alternatives yield delicious results with less oil and fewer calories.
Serving Suggestions
Crispy chicken tenders pair well with a wide variety of sauces, dips, and sides. Here are a few ideas to create a complete meal or snack platter:
Dipping sauces:
Classic ketchup
Honey mustard
Garlic aioli
Spicy mayo
Buffalo sauce
Barbecue sauce
Sweet chili sauce
Sides:
French fries or sweet potato fries
Coleslaw or shredded cabbage salad
Mashed potatoes
Corn on the cob
Macaroni and cheese
Pickles or jalapeños
Fresh veggie sticks with ranch dip
Make it a sandwich by layering tenders on a toasted bun with lettuce, tomato, and your favorite sauce.
Tips for Success
Use fresh, high-quality chicken breast for the best flavor and texture.
Dry the chicken well before marinating to ensure coating sticks properly.
Do not overcrowd the frying pan. Cook in batches for optimal crispiness.
Let the coated tenders rest before frying to prevent the breading from falling off.
Monitor oil temperature and adjust the heat to maintain consistent frying.
For added juiciness, you can soak the chicken in buttermilk for 30 minutes before coating. This step adds flavor and tenderness.
Storage and Reheating
Crispy chicken tenders are best enjoyed fresh, but they can be stored and reheated with good results.
To store:
Allow the tenders to cool completely.
Place them in an airtight container lined with paper towels.
Store in the refrigerator for up to 3 days.
To reheat:
In the oven: Preheat to 180°C (350°F). Bake for 8 to 10 minutes until hot and crispy.
In the air fryer: Heat at 180°C (350°F) for 5 to 7 minutes.
Avoid microwaving, as it tends to make the coating soggy.
Freezing
To freeze uncooked tenders:
Coat the chicken as instructed.
Place them on a baking sheet in a single layer. Freeze until solid.
Transfer to freezer bags or containers.
Cook directly from frozen by baking or air frying. Add a few extra minutes to the cooking time.
To freeze cooked tenders:
Let them cool completely.
Wrap in foil or plastic and place in a freezer-safe bag.
Reheat from frozen in the oven or air fryer.
Variations
Spicy tenders: Add cayenne pepper or hot sauce to the egg wash and breadcrumbs.
Herb-crusted: Add dried oregano, thyme, or rosemary to the breadcrumb mix.
Cheesy crust: Mix grated Parmesan into the flour or breadcrumbs.
Asian-style: Marinate the chicken in soy sauce, ginger, and garlic before coating. Serve with sweet soy dip.
Southern-style: Use seasoned cornmeal and buttermilk for a rustic flavor. Serve with gravy or ranch.
Meal Ideas with Chicken Tenders
Chicken tenders are versatile enough to be used in many meals. Here are some ideas to help you incorporate them into lunch or dinner:
Chicken tender wraps
Place chopped tenders in a tortilla with lettuce, tomato, cheese, and sauce.
Chicken tender salad
Top a fresh green salad with sliced tenders and a creamy dressing.
Chicken and waffles
Serve tenders with Belgian waffles and drizzle with maple syrup or hot honey.
Tenders and rice bowl
Serve over steamed rice with vegetables and teriyaki or sriracha mayo.
Tenders with pasta
Use sliced tenders as a topping for creamy pasta dishes like Alfredo.
Final Thoughts
Crispy chicken tenders are a timeless, satisfying dish that brings joy to any table. Their crispy golden coating, juicy interior, and universal appeal make them perfect for quick family meals, school lunches, party platters, or simple comfort food cravings.
With basic pantry ingredients and a few easy steps, you can make these delicious tenders at home without relying on frozen or fast-food versions. Once you master the basics, feel free to explore variations and flavor profiles that suit your taste.
Whether fried to perfection or baked for a lighter version, homemade chicken tenders are sure to become a staple in your kitchen.