Strawberry cheesecake is a classic dessert loved by many for its creamy texture, sweet-tart flavor, and beautiful presentation. When baked versions feel too heavy or complicated, this no-bake strawberry cheesecake offers the perfect solution. It’s creamy, rich, refreshing, and incredibly easy to put together without the need for an oven.
This version uses a biscuit crust, a fluffy yet rich cream cheese filling, and a decorative top of fresh strawberries, whipped cream, and a drizzle of white chocolate. It’s a beautiful dessert for any season, but especially perfect for spring and summer when strawberries are in peak form.
Ingredients
For the crust:
200g crushed digestive biscuits or graham crackers (about 2 cups)
100g melted butter (about 1/2 cup)
For the filling:
500g cream cheese, softened (about 2 cups)
300ml cold heavy cream or whipping cream (about 1¼ cups)
100g sugar (about 1/2 cup)
1 teaspoon vanilla extract
1 tablespoon lemon juice
10g gelatin + 4 tablespoons warm water (optional, for firmness)
300g fresh strawberries, halved (about 2 cups)
For the topping:
Whipped cream for piping
Whole and halved strawberries
Melted white chocolate for drizzling
Extra biscuit crumbs for garnish
Instructions
Step 1 – Prepare the crust
Begin by crushing the biscuits into fine crumbs using a food processor or by placing them in a sealed plastic bag and crushing them with a rolling pin. Transfer the crumbs to a bowl and stir in the melted butter until the texture resembles wet sand.
Press the mixture firmly into the bottom of a springform pan, spreading evenly to cover the entire base. Use the back of a spoon or a flat-bottomed glass to compress it tightly. Refrigerate the crust for about 20 minutes to firm it up while you prepare the filling.
Step 2 – Make the filling
Whip the cold heavy cream using an electric hand mixer or stand mixer until stiff peaks form. This means when you lift the beaters, the cream stands up without falling over. Once whipped, place it in the fridge.
In another bowl, beat the softened cream cheese with sugar, vanilla extract, and lemon juice until smooth and creamy. This may take a couple of minutes to eliminate any lumps and ensure a silky texture.
If using gelatin for extra firmness, dissolve it in 4 tablespoons of warm water, stir well, and let it cool slightly before adding it to the cream cheese mixture. Mix until fully combined.
Gently fold the whipped cream into the cream cheese mixture in batches, using a spatula. Fold slowly and carefully to keep the mixture light and airy.
Line halved strawberries upright along the inner edge of the chilled crust, cut side facing out. This gives the cheesecake a beautiful border once unmolded.
Pour the cream filling into the pan, covering the base and the strawberries. Smooth the top with a spatula or the back of a spoon. Tap the pan lightly on the counter to eliminate air bubbles. Cover and refrigerate for at least 6 hours, or overnight, to allow the cheesecake to set properly.
Step 3 – Decorate and serve
Once the cheesecake is set, gently release the springform pan and lift off the ring. You should see the lined strawberries perfectly embedded into the edge.
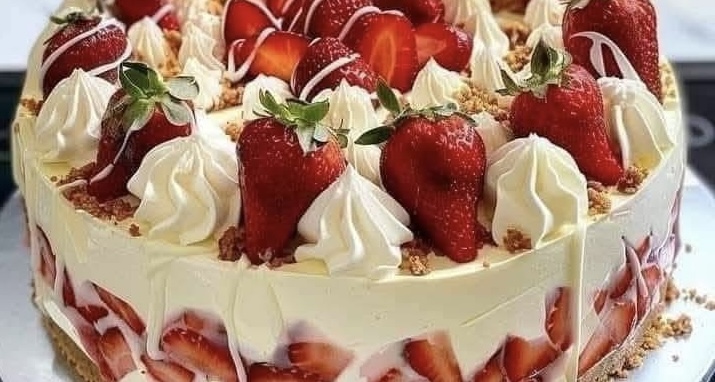
For decoration, pipe whipped cream rosettes around the top edge of the cheesecake. Place whole or halved strawberries in the center or creatively across the top. Drizzle melted white chocolate over the surface for a beautiful contrast in color and flavor. Finally, sprinkle a few crushed biscuit crumbs over the whipped cream or base for a rustic, finished look.
Slice with a sharp, warm knife (dip it in hot water and wipe before each slice) for clean, neat portions.
Why This Recipe Works So Well
The contrast between the buttery, crumbly crust and the smooth, sweet, tangy filling is unbeatable. The strawberries provide a fresh, fruity burst in every bite, while the whipped cream adds softness and airiness. Lemon juice balances the richness with a light citrus note, and the gelatin (though optional) gives just enough structure to ensure easy slicing.
It’s perfect for those who prefer chilled, creamy desserts over baked ones. No water baths, no cracks, no fuss — just simple layering, mixing, and chilling.
Tips for Success
Use room temperature cream cheese to avoid lumps in the filling.
Whip the cream cold from the fridge for the best volume.
Do not skip the chilling time. A full overnight chill is ideal for a firm, sliceable texture.
Use fresh strawberries, not frozen ones, for lining and topping to maintain firmness and color.
If not using gelatin, chill for longer to compensate, or freeze slightly before unmolding for cleaner edges.
Variations
Chocolate twist: Add 2 tablespoons of cocoa powder to the crust or drizzle dark chocolate over the top instead of white.
Berry mix: Replace half the strawberries with blueberries, raspberries, or blackberries.
Mini cheesecakes: Use a muffin tin lined with paper cups to make individual servings.
Nutty base: Mix in crushed almonds or walnuts with the biscuit base for added crunch.
Storage and Make-Ahead
This cheesecake stores well in the refrigerator for up to 4 days. Keep it covered to prevent drying out. It can also be frozen for up to a month. To freeze, wrap the entire cheesecake or slices tightly in cling film and foil, and thaw in the fridge overnight before serving.
Serving Suggestions
Serve this cheesecake chilled, straight from the fridge. It’s a wonderful finish to a light meal or a festive centerpiece for special occasions like birthdays, anniversaries, or summer dinners.
You can also pair it with:
A berry coulis or fruit sauce
A scoop of vanilla ice cream
Fresh mint leaves for garnish
A dusting of powdered sugar
Final Thoughts
No-bake strawberry cheesecake is one of those desserts that looks impressive but comes together with ease. It’s forgiving, delicious, and loved by both kids and adults alike. From its crisp crust and creamy filling to the fresh fruit and decorative toppings, it delivers everything you want in a homemade treat. Whether you’re an experienced baker or a kitchen beginner, this recipe makes it easy to enjoy a slice of something sweet without turning on the oven.
Prepare it the day before, decorate with love, and serve up a crowd-pleaser that’s as beautiful as it is tasty.