A Classic Comfort Dish Made Easy
Stuffed bell peppers are a delicious and satisfying meal that brings together fresh vegetables, hearty meat, and warm spices in a single dish. Whether you choose to serve them for a cozy family dinner or prepare them ahead for busy weekday meals, this recipe is both versatile and easy to make. With a filling of ground meat, rice, tomatoes, and herbs, these bell peppers are packed with flavor, texture, and wholesome ingredients. Below is a step-by-step guide to preparing classic stuffed bell peppers that are sure to become a favorite in your kitchen.
Ingredients Overview
The beauty of stuffed bell peppers lies in their simplicity. You’ll only need a handful of fresh and pantry-friendly ingredients to create this delicious dish.
Ingredients:
4 large bell peppers (any color)
1 lb (450g) ground meat (beef, turkey, or chicken)
1 cup cooked rice (white or brown)
1 can (15 oz) diced tomatoes (with juices)
1 small onion, diced
2 cloves garlic, minced
1 tsp dried oregano
1 tsp paprika
Salt and pepper to taste
1–2 tbsp olive oil
Optional toppings: shredded cheese, chopped parsley
Preparing the Bell Peppers
Begin by selecting 4 large, firm bell peppers. You can use red, yellow, orange, or green peppers, or a mix for a colorful presentation. Rinse them thoroughly under cold water. Slice off the tops of each pepper and remove the seeds and membranes from inside. You want the peppers to be hollow and ready to hold the filling.
If you want your peppers to be slightly tender before baking, you can blanch them in boiling water for about 2 to 3 minutes. This step is optional, but it can reduce baking time and soften the peppers slightly. After blanching, set them aside to cool.
Cooking the Filling
In a large skillet or sauté pan, heat 1 to 2 tablespoons of olive oil over medium heat. Add the diced onion and cook for about 3 to 4 minutes until softened and translucent. Add the minced garlic and cook for another 30 seconds, stirring frequently to prevent burning.
Next, add the ground meat to the skillet. Break it apart with a spoon and cook until browned and fully cooked through. This usually takes about 6 to 8 minutes, depending on the type of meat you’re using. If there’s excess fat, you can drain it off before proceeding.
Once the meat is cooked, stir in the cooked rice, canned diced tomatoes (with their juices), oregano, paprika, salt, and pepper. Let the mixture simmer on low heat for about 5 to 7 minutes. This will allow the flavors to blend together and reduce some of the excess moisture. Taste the filling and adjust seasoning as needed.
If you’d like to add a cheesy touch, you can mix in a small amount of shredded cheese into the filling at this point, although this is entirely optional.
Stuffing and Baking the Peppers
Preheat your oven to 375°F (190°C). Lightly grease a baking dish large enough to hold all four stuffed peppers upright.
Spoon the meat and rice mixture into each bell pepper, pressing it down gently to make sure each pepper is filled to the top. Arrange the stuffed peppers upright in the prepared baking dish.
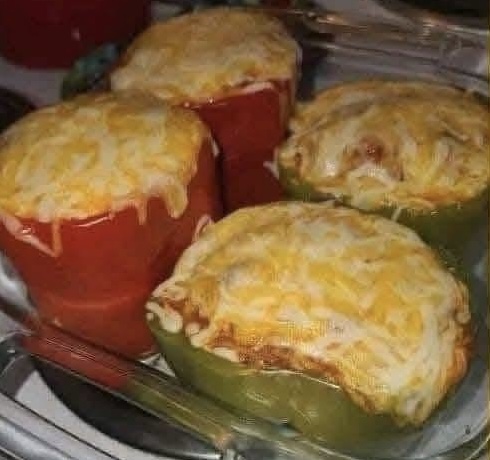
If desired, top each stuffed pepper with a sprinkle of shredded cheese for a golden, melty finish. Cover the baking dish with aluminum foil to keep the peppers moist during baking.
Bake the stuffed peppers for 30 to 35 minutes, or until the peppers are tender and the filling is heated through. If you added cheese, remove the foil during the last 10 minutes of baking to allow the tops to brown slightly.
Once done, remove the dish from the oven and let the peppers rest for a few minutes before serving.
Serving Suggestions
Stuffed bell peppers can be served as a standalone dish, as they contain protein, vegetables, and grains all in one package. However, they also pair wonderfully with a variety of sides.
Some ideas for serving include:
- A fresh green salad with a light vinaigrette
- Roasted or steamed vegetables such as broccoli or green beans
- Garlic bread or crusty rolls
- Mashed potatoes or a light pasta salad
For added brightness, garnish the peppers with freshly chopped parsley or a squeeze of lemon juice before serving.
Tips and Variations
One of the best things about stuffed peppers is how adaptable they are to different tastes and dietary needs. Here are some helpful tips and variations:
- Vegetarian Option: Replace the ground meat with cooked lentils, black beans, or a meat substitute for a vegetarian-friendly version.
- Grain Variations: Instead of rice, try quinoa, couscous, or bulgur for a different texture and flavor.
- Sauce Boost: Add a spoonful of tomato sauce or marinara inside each pepper before stuffing for extra moisture and richness.
- Spicy Kick: For a bit of heat, add red pepper flakes or chopped jalapeños to the filling.
- Meal Prep Friendly: Stuffed peppers reheat well and can be stored in the refrigerator for up to 4 days. They also freeze beautifully—wrap each pepper tightly in foil or plastic wrap and store in an airtight container for up to 2 months.
Why This Recipe Works
This stuffed bell pepper recipe strikes a perfect balance between flavor, nutrition, and simplicity. The filling is hearty and savory, with the mild sweetness of the bell peppers complementing the richness of the meat and rice mixture. The blend of oregano and paprika adds subtle depth without overwhelming the dish, making it appealing for a wide range of palates.
Moreover, using cooked rice and canned tomatoes helps save time while still delivering satisfying results. The optional cheese topping adds indulgence, but the dish is still delicious without it for those watching their dairy intake.
Final Thoughts
Stuffed bell peppers are a timeless meal that can be tailored to fit nearly any taste or occasion. Whether you’re looking to impress guests or simply prepare a wholesome dinner for yourself or your family, this recipe provides a reliable foundation with plenty of room for creativity. Try making a batch today and enjoy the comforting combination of flavors that make this dish a favorite across generations.