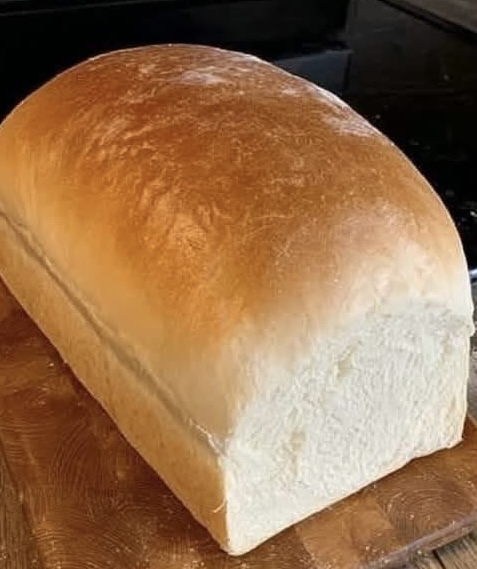
There’s something deeply comforting about the smell of freshly baked bread drifting through a kitchen. For many, bread is more than just a side dish. It’s a warm, soft slice of home. This simple homemade bread recipe yields two beautifully risen loaves with a soft, tender crumb and golden crust. Whether enjoyed with butter, jam, or just as-is, each bite is a reminder that some of the best things in life come from scratch.
This recipe is perfect for both beginner and seasoned bakers. It uses basic pantry staples, doesn’t require any fancy equipment, and follows straightforward steps that guide you from a bowl of flour to warm loaves cooling on your countertop. It’s a recipe that’s been loved, tested, and passed along time and again.
Ingredients
• 2 cups warm water
• 1/4 cup sugar
• 1.5 tablespoons active dry yeast
• 1.5 teaspoons salt
• 1/4 cup vegetable oil
• 5.5 cups all-purpose flour
Step 1: Preparing the Yeast
Begin by dissolving 1/4 cup of sugar into 2 cups of warm water. The water should be warm to the touch—not hot. Ideal temperature is around 105°F to 110°F (40°C to 43°C). Too hot, and the yeast will die; too cold, and it won’t activate properly.
Once the sugar is fully dissolved, sprinkle the yeast over the surface of the water. Stir gently and let the mixture sit for about 5 to 10 minutes. During this time, the yeast will begin to bloom, forming a creamy, foamy layer on top of the water. This is known as proofing the yeast. It’s an essential step to ensure the yeast is alive and ready to leaven the dough.
If, after 10 minutes, the surface remains flat with no froth or bubbles, the yeast may be expired or the water temperature may have been off. If that happens, it’s best to start again with fresh yeast.
Step 2: Adding the Oil
Once the yeast has proofed and the mixture looks frothy and active, pour in the 1/4 cup of vegetable oil. Stir the mixture gently to combine. The oil will help give the final bread a tender, moist texture and make the dough easier to handle during kneading. It also contributes to a soft crust, which is ideal for everyday sandwich-style loaves.
Step 3: Mixing the Dry Ingredients
In a large separate bowl, combine the 5.5 cups of all-purpose flour and 1.5 teaspoons of salt. It’s important to mix the flour and salt together before adding them to the wet ingredients. Salt can inhibit yeast growth if it comes into direct contact with it, so blending it evenly throughout the flour helps distribute it gently.
All-purpose flour works well for this recipe, giving a soft but sturdy crumb. If you prefer a slightly heartier texture, you can experiment later with a blend of whole wheat and all-purpose flours, though for this base recipe, sticking with all-purpose ensures soft, fluffy loaves.
Step 4: Combining Wet and Dry Ingredients
Now comes the process of forming the dough. Gradually add the flour mixture to the wet yeast mixture, one cup at a time. Stir gently after each addition, allowing the flour to incorporate fully before adding more. You can use a wooden spoon, a dough whisk, or even your hands for this step. As the mixture thickens, it will become harder to stir.
Once all the flour is added, the dough should come together into a soft, slightly sticky ball. If it feels too wet and sticky to work with, you can add a bit more flour—just a tablespoon at a time—until it reaches the right consistency. Be careful not to overdo it; too much flour will lead to dense, dry bread.
Step 5: Kneading the Dough
Transfer the dough onto a lightly floured surface and begin kneading. Kneading develops the gluten in the flour, which gives the bread its structure and chew. To knead, use the heel of your hand to push the dough away from you, then fold it back over itself, give it a quarter turn, and repeat.
Continue kneading for about 3 to 5 minutes. The dough should become smoother, more elastic, and easier to handle. You don’t need to knead excessively; just long enough to get a cohesive, slightly springy texture. You’ll know it’s ready when it bounces back slightly when pressed with a fingertip.
Step 6: First Rise
Place the kneaded dough into a large, lightly oiled bowl. Turn the dough over so all sides are lightly coated in oil. This prevents the dough from drying out during rising and makes it easier to handle later. Cover the bowl with a clean kitchen towel or plastic wrap.
Set the bowl in a warm, draft-free area and let it rise for about one hour. During this time, the yeast will feed on the sugars in the dough and release carbon dioxide, causing the dough to expand and double in size.
Step 7: Shaping the Loaves
After an hour, the dough should have roughly doubled in size. Gently punch it down to release the built-up gas. This doesn’t mean smashing the dough flat—just press gently with your fist to deflate it slightly and redistribute the yeast.
Turn the dough out onto a lightly floured surface again. Divide it evenly in half. Take each half and gently shape it into a loaf. You can do this by flattening the dough slightly into a rectangle, then rolling it up like a jelly roll and tucking the ends under.
Place each shaped loaf into a greased bread pan. A standard 9×5 inch loaf pan works well. The loaves should fill the pans about halfway, leaving room for a second rise.
Step 8: Second Rise
Cover the pans loosely with a towel or plastic wrap and allow the dough to rise again for 30 to 40 minutes. This second rise, or proof, lets the dough develop a lighter texture and reach its final volume before baking.
As the loaves rise, preheat your oven to 350°F (175°C). The loaves are ready for baking when they’ve puffed up to the top of the pan or slightly above.
Step 9: Baking
Place the bread pans into the preheated oven and bake for approximately 30 minutes. Oven times may vary, so start checking around the 25-minute mark. The tops should turn golden brown, and the loaves should sound hollow when tapped on the top or bottom.
If you’re unsure, you can insert a thermometer into the center of the loaf. A fully baked loaf will register around 190°F to 200°F internally.
Step 10: Buttering and Cooling
As soon as the loaves come out of the oven, brush the tops with butter. This step adds flavor, keeps the crust soft, and gives the bread a beautiful sheen. You can use salted or unsalted butter, depending on your preference.
Allow the loaves to cool in the pans for 5 to 10 minutes, then gently turn them out onto a wire rack to finish cooling. Resist the urge to slice immediately. Cutting into hot bread can cause it to become gummy inside. Letting it cool allows the crumb to set properly and makes slicing easier.
Serving and Storage
Once the loaves have cooled, slice and serve as desired. This bread is delicious on its own or with a bit of honey, jam, or butter. It also makes excellent sandwiches, toast, and French toast.
To store, wrap the loaves tightly in plastic wrap or place them in a bread bag. They will keep at room temperature for up to three days. For longer storage, wrap and freeze the loaves or individual slices. To reheat, just pop a slice in the toaster or warm a whole loaf in the oven.
Tips and Variations
This base recipe is incredibly flexible. Once you’re comfortable with it, you can try adding herbs, seeds, or cheese to the dough before baking. You can also shape the dough into rolls or braid it for a different presentation.
• Add 1 tablespoon of dried rosemary or Italian herbs to the flour for a savory loaf.
• Sprinkle sesame or poppy seeds on top before baking for added texture.
• Mix in shredded cheese and diced jalapeños for a spicy twist.
• Replace 1 to 2 cups of all-purpose flour with whole wheat flour for a heartier loaf.
• For a touch of sweetness, swirl cinnamon sugar through the dough or add raisins or dried cranberries.
Final Thoughts
Making bread at home can feel like a lost art, but this recipe brings it back to the basics in the most approachable way. It uses simple ingredients, no specialty tools, and relies on a tried-and-true process that yields dependable results. The bread is soft, flavorful, and perfect for everyday use.
Whether you’re baking for your family, preparing for a cozy dinner, or simply want to enjoy the satisfaction of making something from scratch, these two loaves will reward your efforts with warmth, aroma, and taste that store-bought bread simply can’t match. Once you’ve made it, you’ll want to keep this recipe close by—it just might become a regular part of your kitchen routine.